
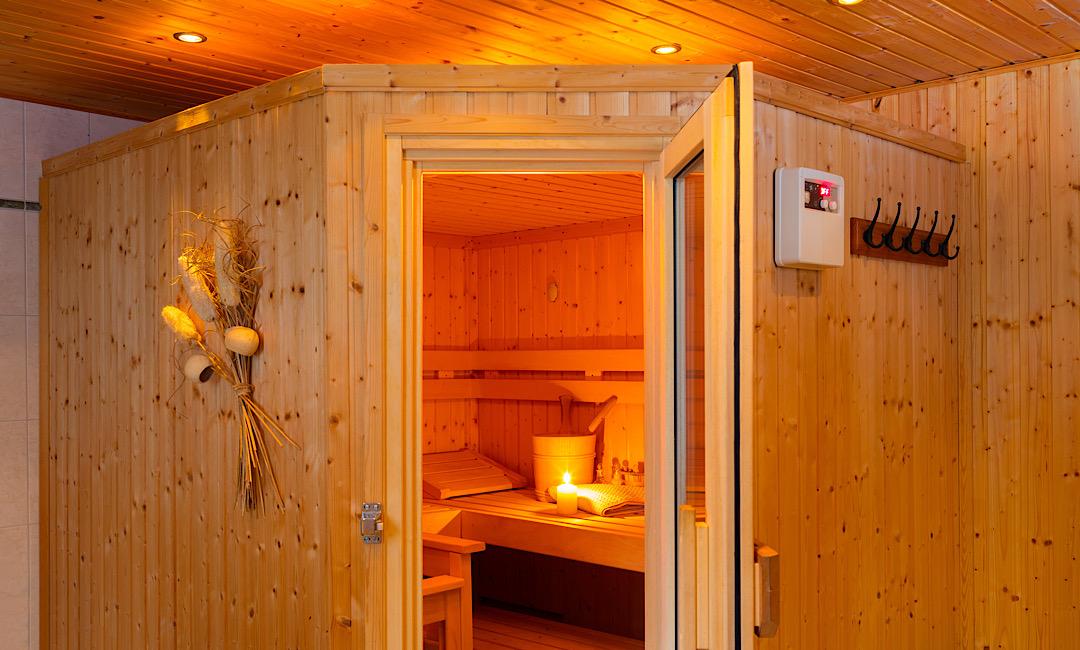
Turn your basement into a wellness space—without creating moisture or electrical headaches
A basement sauna can be one of the most rewarding upgrades a Colorado homeowner makes: it’s private, quiet, and usable year-round. The catch is that basements demand extra attention to moisture control, fresh air, and electrical planning. If you’re researching basement sauna installation, this guide lays out the real-world requirements to plan for—so your sauna feels amazing and your basement stays healthy.
1) Choose your sauna type first (it changes everything downstream)
“Sauna” can mean a few different systems, and each one affects your electrical load, heat-up time, and how you handle ventilation:
Common basement sauna options
Traditional electric (rock heater): Hotter air temps, classic “Finnish” feel, usually needs 240V and a dedicated circuit.
Infrared: Lower ambient air temperature, often smaller electrical demand (some models plug in), still requires smart moisture and air planning.
Hybrid: Combines traditional + infrared features; can mean multiple circuits depending on design.
If your basement goal is “daily wellness,” infrared can be a great fit. If your goal is “true sauna heat + steam bursts from water on rocks,” traditional electric is usually the direction.
2) Electrical planning: dedicated circuits, voltage, and panel capacity
Electrical is where many “simple sauna” ideas get expensive—or get postponed—so it’s worth planning early.
Typical power needs (what homeowners run into most often)
Many traditional electric sauna heaters are designed around 240V with dedicated breaker sizing that matches the heater’s kW rating, while some smaller infrared units can run on 120V (often a dedicated 15A–20A circuit depending on the model). Always follow the manufacturer’s electrical specs and use a licensed electrician for final design and permitting.
| Sauna type / size (typical) | Common voltage | Common circuit notes | What to confirm in your home |
|---|---|---|---|
| Small infrared (1–2 person) | 120V (some models), sometimes 240V | May be plug-in or dedicated circuit; depends on heater load | Outlet location, circuit capacity, and whether a dedicated circuit is required |
| Traditional electric (common residential) | 240V | Dedicated 240V circuit; breaker and wire sized to heater specs | Main panel capacity and routing distance from panel to sauna |
| Larger sauna / higher-output heater | 240V | Higher amperage; may trigger panel upgrade depending on other loads | Load calculation: range, EV charger, hot tub, A/C, electric water heater, etc. |
Basements + code reality: GFCI/AFCI and inspection
In Colorado, many jurisdictions are aligned with the 2023 NEC for residential electrical work (with local amendments). That can affect items like GFCI requirements in basements and any “wet-adjacent” receptacles near sinks or drains. Even when a sauna itself is hardwired, the surrounding basement remodel often adds outlets, lighting, and fans that fall under current code rules—so plan the sauna as part of the whole basement electrical scope.
3) Ventilation: make it feel good, and protect the rest of your basement
Basements are already prone to stale air and humidity. A sauna adds heat and (depending on how you use it) moisture, which can drift into adjacent rooms if airflow isn’t intentional.
Ventilation goals (simple and effective)
Fresh air in: so the sauna doesn’t feel stuffy and oxygen-depleted.
Warm air out: so heat and humidity don’t linger in the sauna cavity.
Basement protection: avoid dumping humid air into finished spaces where it can condense on cool surfaces.
For many basement layouts, homeowners end up with a dedicated exhaust strategy (sometimes tying into an approved duct route, sometimes a dedicated fan depending on the plan). The right approach depends on where the sauna sits (interior corner vs exterior wall), whether there’s a nearby mechanical room, and how the rest of the basement is conditioned.
4) Moisture management: the “basement sauna” detail that matters most
Colorado is dry, but basements still see seasonal moisture, snowmelt, and the occasional plumbing surprise. A sauna should be built like a contained “hot box” so moisture and heat don’t migrate into framing cavities.
Key building details to get right
Vapor control layer: A sauna needs a continuous vapor-resistant layer on the warm side of walls/ceiling with carefully sealed seams and penetrations. This is one of the biggest differences between “finishing a room” and “building a sauna.”
Insulation strategy: Proper insulation helps the sauna heat efficiently and reduces temperature gradients that can drive condensation.
Floor plan for water: Even “dry” saunas see sweat, wet feet, and periodic cleaning. Plan surfaces and transitions so water can’t disappear under walls or wick into trim.
Basement dehumidification: Many finished basements benefit from a dehumidifier; adding a sauna can make that even more important—especially in summer storms or monsoon season along the Front Range.
5) Comfort upgrades: acoustics, lighting, and the “spa feel” details
Your persona (and most Colorado homeowners remodeling in 2026) wants inspiration and technical execution. These are the upgrades that make a basement sauna feel intentional instead of “a box in the corner”:
Acoustics
If the sauna shares a wall with a theater room or a lively rec room, plan sound isolation early. Basements can transmit low frequencies surprisingly well. Strategic wall assemblies and door choices keep your sauna calm and your entertainment zone energetic—without conflict.
Lighting
Soft, dimmable, heat-rated lighting creates a true recovery vibe. A common mistake is overly bright ceiling light that feels like a utility closet. Aim for warm color temperature and glare control.
Recovery zone planning
A sauna is better when there’s a nearby cool-down area: a small seating nook, a shower, or a bathroom. If you’re already finishing the basement, integrating a basement bathroom nearby can improve day-to-day usability and reduce moisture spreading through the basement.
6) Step-by-step: how to plan a basement sauna that passes the “real life” test
Step 1: Pick the location based on air + access
Choose a spot where you can route electrical cleanly, manage exhaust, and still keep comfortable circulation in the finished basement. Avoid squeezing the sauna into the dampest corner just because it’s unused.
Step 2: Confirm electrical pathway and panel capacity
Before you fall in love with a specific model, confirm whether you need 120V vs 240V, what amperage is required, and whether your panel has room for a new dedicated breaker. If a panel upgrade is likely, it’s better to know early.
Step 3: Design ventilation with the basement as a system
Think beyond the sauna cabin. Ask: “Where does that air go?” The goal is to prevent humid air from drifting into finished rooms and condensing on cool foundation walls.
Step 4: Build the enclosure for moisture durability
Sauna detailing should prioritize sealed vapor control, careful penetrations, and materials that tolerate heat and cleaning. This is not a place for “close enough” construction habits.
Step 5: Add the comfort layer last
Once the technical foundation is right—power, air, moisture—then refine the experience: lighting, bench layout, door swing, and adjacent shower or lounge area.
Colorado Front Range angle: basements, snowmelt, and big temperature swings
Along Colorado’s Front Range, basements experience sharp seasonal changes—cold foundation walls in winter, warmer humid air in summer storms, and real snowmelt pressure around window wells and exterior grading. A sauna can be a perfect fit here, but it should be planned with a “Colorado basement” mindset:
Prioritize water control first: If your basement has any history of moisture, address drainage, grading, and sump strategy before finishing.
Expect permit and inspection steps: Most basement remodels that add walls, electrical, ventilation, or plumbing require permits.
Plan for whole-basement comfort: If your sauna is near a basement gym or family room, you’ll want balanced HVAC and humidity control so every zone feels right.
Want a basement sauna that feels luxurious and stays code-clean?
ElkStone Basements specializes in basement renovations—so your sauna can be designed as part of a complete, finished space with the right power, ventilation, and moisture details from day one.
Schedule a Basement Sauna Consultation
Prefer a faster path to a finished basement? Explore Express Basement Finishing and add specialty spaces as your plan evolves.
FAQ: Basement Sauna Installation
Do I need 240V for a basement sauna?
Many traditional electric saunas do, while some smaller infrared models can run on 120V. The correct answer depends on the heater’s rated load and the manufacturer’s installation requirements. Plan for a dedicated circuit either way.
Does a sauna need ventilation if it’s “dry”?
Yes. Even dry saunas benefit from fresh air and a controlled path for warm air to leave the cabin. In a basement, ventilation also helps protect adjacent finished rooms from heat and humidity migration.
Can I put a sauna on carpet in my finished basement?
It’s rarely ideal. You’ll want a durable, cleanable surface at the sauna footprint and at the entry zone where wet feet happen. Your remodel plan should also prevent water from wicking into surrounding finishes.
Do I need a floor drain for a basement sauna?
Not always, but it can be helpful depending on how you use and clean the sauna. What matters most is having a plan for moisture at the entry and a bathroom/shower strategy if sauna sessions are frequent.
Will adding a sauna increase basement humidity?
It can—especially if ventilation is weak or if humid air is released into the basement after sessions. A good plan includes controlled ventilation and, in many finished basements, a dehumidification strategy.
Can ElkStone Basements incorporate a sauna into a full basement finish?
Yes—saunas pair well with finished basements that include wellness, entertainment, and recovery zones. If you’re building a complete lower level (gym, bathroom, lounge, wet bar), designing the sauna as part of the total plan helps everything work together.
Glossary (quick definitions)
Dedicated circuit
An electrical circuit reserved for one appliance (like a sauna heater), designed to prevent overloads and comply with manufacturer/code requirements.
GFCI
Ground-fault circuit interrupter protection that reduces shock risk by quickly shutting off power when a ground fault is detected—important in basements and moisture-adjacent areas.
Vapor control layer
A continuous, sealed layer intended to slow moisture vapor movement—especially important on the warm side of sauna walls/ceilings to protect framing cavities.
Make-up air
Replacement air that enters a space as exhaust air leaves—critical for comfortable sauna breathing and to prevent pressure issues in tight basements.
Looking for more basement inspiration beyond wellness spaces? Browse basement design ideas or see what’s possible with custom basement finishing.

Recent Comments